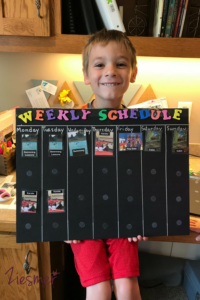
 I decided to make a picture schedule for my six year old grandson. He will be entering kindergarten this year. While each of the children are unique in their own way Josh’s quirks are more of the ASD variety. He likes routine, he needs to know what is happening next so he feels a little bit of control over his environment. He also likes his downtime. Time that he can just sit and chill by himself or with his siblings. Usually this involves playing video games. Right now his passion is Mario Makers.
I have noticed some regression in him over the summer. He is more moody and less cooperative. He falls apart and has meltdowns more frequently. To help him through this and to also begin to prepare him for the school transition next month we have decided to make a picture schedule.
Steps to making a picture schedule
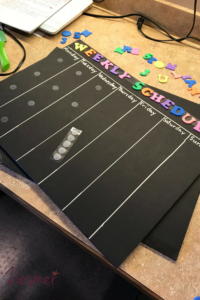
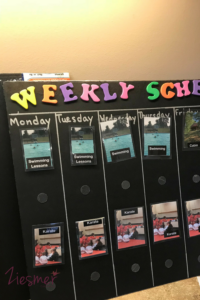
I used black foam board as the base and prettied it up with foam letters and of course the pictures. It’s really prett y simple and you can create it to look however you choose.
I cut the board in half using a knife and a straight edge. Since my board was black I used a silver marker so it would show up better. I marked off each day of the week and made two weeks. Using only two weeks at a time it gives him an idea of what’s coming up but we can really focus on the week we are in. If I use more than that it gets too overwhelming for him and I end up losing his attention.
Once I had the Foam letters going across the top and the lines drawn I added the days of the week. You can see on one board I hand wrote them and on the other I printed them out. It is really about how you want it to look. I then added the velcro, being sure to use the same side for the base of the calendar on both.
I made a list of all the activities we do during the week. Things like swimming lessons, karate lessons, play dates and special trips such as the park or the zoo. I found pictures that represent all of these things and printed them out. Cut the photos out first and then place them on the laminating sheet before running it through the laminator. I have found that this method saves on laminating sheets. When I have cut them apart after they do not always stay sealed around the edges and need to be redone.
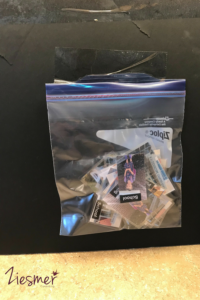
Once I had them all laminated and cut out, I put the fuzzy side of the velcro on each picture. I taped a ziplock to the back of the board to hold the extra photos And wallah! You have yourself a photo schedule.
Here is a list of the supplies I used:
- Black foam tag board- I used this one
- Foam letters- These worked great!
- Silver Marker- I LOVE these sharpies!
- Laminator- Having my own laminator makes it so easy to do projects! This one is cheap and so far seems to do the job!
- Laminating sheets-These are the ones I used for this project.
- Velcro Dots- These velcro brand ones seem to stick the best for me.
Using a picture schedule for children with ASD or anxiety is a good thing to do but it is only one thing in the toolbox of tricks we use to help keep our little guy functioning well. One thing I have learned is that consistency and follow through are the keys to helping any child grow and learn regardless of their abilities. Let me know in the comments how a schedule works for you. Whether in your home or your classroom.


Leave a Reply